 d4e2554ca4
* Add a BTCPay Server SSO harness to the docker fixture

BTCPay bundles RTL and runs it in single-sign-on mode, reached over an entry
path the standalone login never exercises: no password, a rotating cookie file,
an unregistered /rtl/api/authenticate/cookie URL that falls through to the
catch-all in server/utils/app.ts, and a reverse proxy in front. Regressions on
that path have previously gone unnoticed until they reached BTCPay users.

Adds an "sso" compose profile, so a plain `docker compose up -d` is unchanged:

  - rtl-sso, a second RTL running with RTL_SSO=1, RTL_COOKIE_PATH and
    LOGOUT_REDIRECT_LINK -- the environment block lifted verbatim from BTCPay's
    own compose fragment, so this exercises the env-driven SSO path BTCPay
    actually uses. A second container is required because RTL selects one
    authentication mode at startup, so SSO and password login cannot coexist in
    one instance.
  - rtl-sso-config-init, staging rtl/RTL-Config.sso.json into a volume -- the
    same copy-into-a-volume dance the standalone RTL already needs, because RTL
    rewrites its config on startup.
  - rtl-sso-proxy, nginx standing in for BTCPay's traefik, routing only /rtl
    and /rtl/* exactly as BTCPay's router rule does. There is no prefix
    stripping anywhere: RTL is built with <base href="/rtl/"> and mounts every
    route under baseHref '/rtl', so the prefix is passed through unmodified.
    Everything outside /rtl 404s, so a request escaping the prefix surfaces as
    a failure rather than being quietly served.

scripts/verify-sso.sh asserts the whole flow in 11 checks -- prefix routing,
CSRF token minting on the catch-all, the sha256 access-key handshake, an
authenticated node call, cookie rotation on login, and rejection of a wrong key
-- and exits non-zero so it can gate a change. bin/sso-url prints the link
BTCPay renders on its Services page. RTL_IMAGE overrides both RTL containers at
once, so a branch build gets tested through both entry paths.

BTCPay itself (postgres, nbxplorer, btcpayserver) is deliberately not included;
the README documents what that leaves untested and how to run against BTCPay's
own regtest stack when the question is BTCPay's behaviour rather than RTL's.

Also bumps the fixture's default RTL image from v0.15.8 to v0.15.10.

* Document the SSO harness in the rtl-docker-fixture skill

* Point CLAUDE.md at the BTCPay SSO harness

* Note that no CI runs on an open PR
|
||
|---|---|---|
| .claude/skills/rtl-docker-fixture | ||
| .github | ||
| backend | ||
| docker | ||
| frontend | ||
| release-notes | ||
| server | ||
| src | ||
| test/backend | ||
| .dockerignore | ||
| .editorconfig | ||
| .eslintrc.json | ||
| .gitattributes | ||
| .gitignore | ||
| angular.json | ||
| CLAUDE.md | ||
| CONTRIBUTING.md | ||
| Dockerfile | ||
| eslint.config.js | ||
| LICENSE | ||
| package-lock.json | ||
| package.json | ||
| rtl.js | ||
| Sample-RTL-Config.json | ||
| tsconfig.json | ||
Ride The Lightning (RTL)
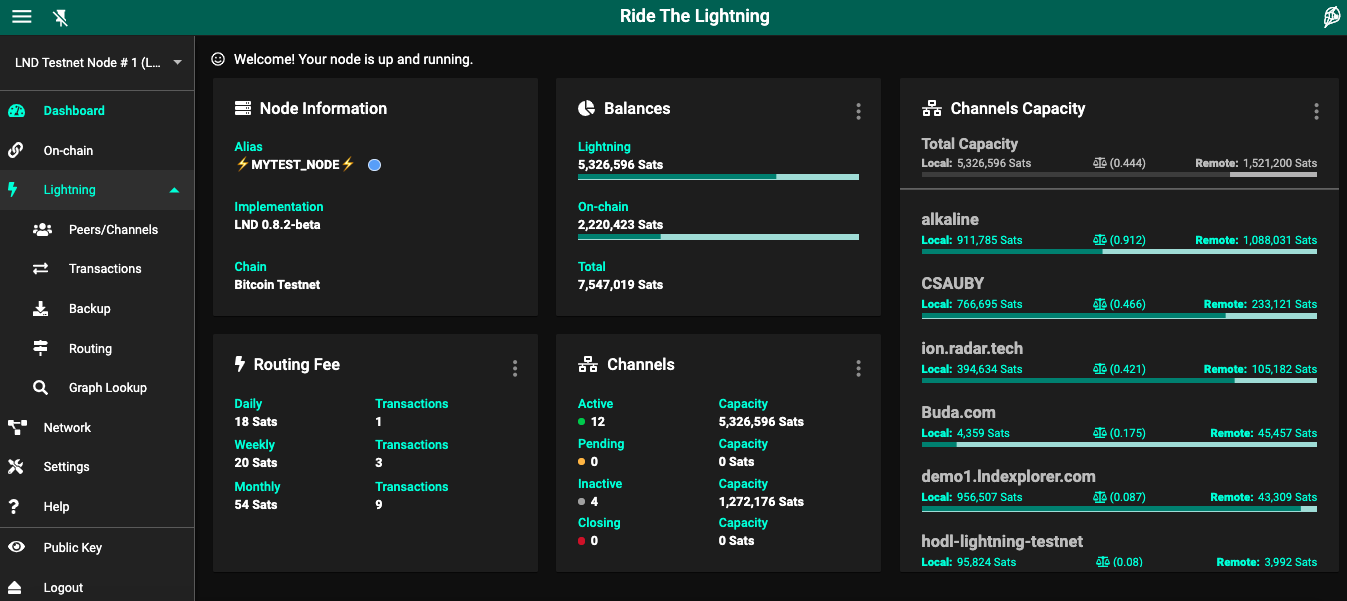


Intro -- Application Features -- Road Map -- Application Configurations -- Core Lightning -- Eclair -- Contribution -- Release Notes
- Introduction
- Architecture
- Prerequisites
- Installation
- Prep For Execution
- Start The Server
- Access The Application
- Troubleshooting
Introduction
RTL is a full function, device agnostic, web user interface to help manage lightning node operations. RTL is available on LND, CoreLightning and Eclair implementations.
- Core Lightning users, refer to this page for install instructions.
- Eclair users, refer to this page for install instructions.
- LND users, follow the instructions below
Pre-requisite for running RTL is a functioning and synced LND node. If you are a Raspberry Pi or a Linux user, you can follow the famous Stadicus's guide to setup a Bitcoin + Lighting node.
RTL is available on the below platforms/services:
Docker Image: https://hub.docker.com/r/shahanafarooqui/rtl
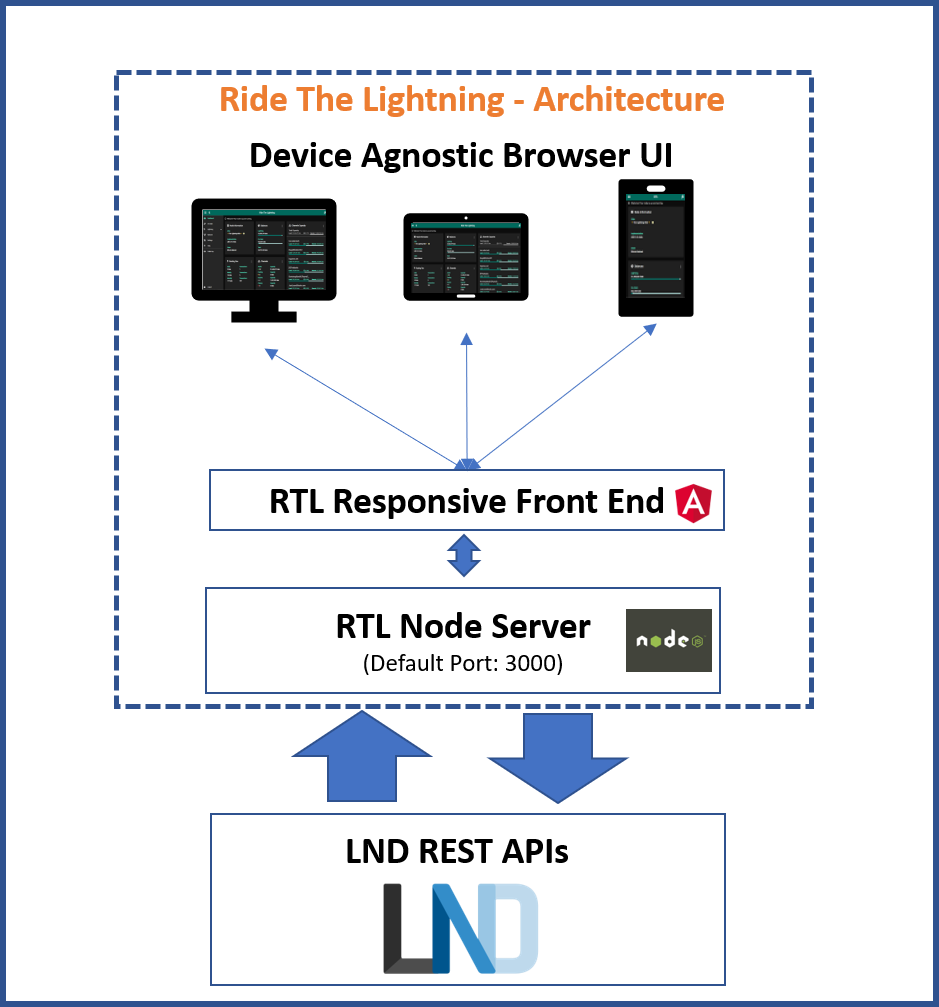
Architecture
Prerequisites
- Functioning and synced LND lightning node.
- Node.js, which can be downloaded here
- Recommended Browsers: Chrome, Firefox, MS Edge
Installation
To download a specific RTL version follow the instructions on the release page
To download from master (not recommended):
First time setup
$ git clone https://github.com/Ride-The-Lightning/RTL.git
$ cd RTL
$ npm ci --omit=dev --legacy-peer-deps
Or: Update existing dependencies
$ cd RTL
$ git reset --hard HEAD
$ git clean -f -d
$ git pull
$ npm ci --omit=dev --legacy-peer-deps
Prep for Execution
RTL requires its own config file RTL-Config.json, to start the server and provide user authentication on the app.
Advanced users can refer to this page, for config settings required to manage multiple nodes
- Rename the file
Sample-RTL-Config.jsontoRTL-Config.jsonlocated at./RTL. - Locate the complete path of the readable macroon file (admin.macroon) on your node and the lnd.conf file.
- Modify the
RTL-Config.jsonfile per the example file below
Example RTL-Config.json:
{
  "multiPass": "password",
  "port": "3000",
  "defaultNodeIndex": 1,
  "dbDirectoryPath": "<Complete path of the folder where rtl's database file should be saved>",
  "SSO": {
    "rtlSSO": 0,
    "rtlCookiePath": "",
    "logoutRedirectLink": ""
  },
  "nodes": [
    {
      "index": 1,
      "lnNode": "LND Testnet",
      "lnImplementation": "LND",
      "authentication": {
        "macaroonPath": "<Complete path of the folder containing LND admin.macaroon for the node>",
        "runePath": "<Complete path including filename for CLN rune for the node, rune format 'LIGHTNING_RUNE="your-rune"'>",
        "lnApiPassword": "<Can be used to provide password in ECL implementation>",
        "swapMacaroonPath": "<Complete path of the folder containing Loop's loop.macaroon for the node>",
        "boltzMacaroonPath": "<Complete path of the folder containing Boltz admin.macaroon for the node>",
        "configPath": "<Optional:Path of the .conf if present locally or empty>",
      },
      "settings": {
        "userPersona": "OPERATOR",
        "themeMode": "DAY",
        "themeColor": "PURPLE",
        "channelBackupPath": "C:\\RTL\\backup\\node-1",
        "bitcoindConfigPath": "<Optional: path of bitcoind.conf path if available locally>",
        "logLevel": "INFO",
        "fiatConversion": false,
        "unannouncedChannels": false,
        "lnServerUrl": "<url for LND REST APIs for node #1 e.g. https://192.168.0.1:8080>",
        "swapServerUrl": "<url for swap server REST APIs for the node. e.g. https://127.0.0.1:8081>",
        "boltzServerUrl": "<url for boltz server REST APIs for the node. e.g. https://127.0.0.1:9003>",
        "blockExplorerUrl": "<url for local or centralized block explorer. e.g. https://mempool.space>"
      }
    }
  ]
}
For details on all the configuration options refer to this page.
User Authentication on RTL
RTL requires the user to be authenticated by the application first, before allowing access to LND functions.
Specific password must be provided in RTL-Config.json (in plain text) for authentication. Password should be set with multiPass:<user defined> in the Authentication section of RTL-Config.json. Default initial password is password.
For hosted solutions such as BTCPayServer, we implemented an "SSO" setup using a one-time-use cookie. For other vendors which have their own authentication service, we introduced a "disableAuth" option, which disables authentication at the RTL level. When using this option, the authentication security is the responsibility of the Vendor. This option is NOT recommended for standalone users of RTL.
Start the Server
Run the following command:
$ node rtl
If the server started successfully, you should get the below output on the console:
$ Server is up and running, please open the UI at http://localhost:3000 or your proxy configured url.
Optional: Running RTL as a service (Rpi or Linux platform users)
In case you are running a headless Rpi or a Linux node, you can configure RTL as a service.
- Create RTL systemd unit and with the following content. Save and exit.
# Raspibolt RTL: systemd unit for RTL
# /etc/systemd/system/RTL.service

[Unit]
Description=RTL daemon
Wants=lnd.service
After=lnd.service

[Service]
ExecStart=/usr/bin/node <Full path of the RTL folder>/rtl
User=<user>
Restart=always
TimeoutSec=120
RestartSec=30

[Install]
WantedBy=multi-user.target
- enable and start RTL
$ sudo systemctl enable RTL
$ sudo systemctl start RTL
- montior the RTL log file in realtime(exit with Ctrl-C)
$ sudo journalctl -f -u RTL
Accessing the Application
You can access the application in multiple setups (Please make note of the 4th exception):
-
Same device as the server: Open your browser at the following address: http://localhost:3000 to access the RTL application.
-
Remotely from another device on the same local network (home network) as the node(RTL server+LND running on the same device):
- Ensure that the if a firewall running on your node, it allows access on port 3000 (or the custom port configured for RTL).
- Determine the IP address of your node to access the application. E.g. if the IP address of your node is 192.168.0.15 then open your browser at the following address: http://192.168.0.15:3000 to access RTL.
-
Config tweaks for running RTL server and LND on separate devices on the same network can be found here.
-
Any Other setup: Please be advised, if you are accessing your node remotely via RTL, its critical to encrypt the communication via use of https. You can use solutions like nginx and letsencrypt or TOR to setup secure access for RTL.
- Sample SSL setup guide can be found here
- (For advanced users) A sample SSL guide to serve remote access over an encrypted Tor connection can be found here
Troubleshooting
In case you are running into issues with the application or if you have feedback, feel free to open issues on our github repo. You can also reach out to us via twitter DM on @Suheb__ or @RTL_App. Thanks for your interest.